

आप will need an image editing program. I use Corel Paint खरीडिए Pro but I think most people use Photoshop.
There's also the following online programs but I've never used them and this tutorial isn't necessarily meant to be used with them because I have no idea what these programs are capable of doing.
link
link
link
the Size of Your आइकन Matters
Now this part is extremely important and I can't tell आप how many आइकनों I've seen that have been botched because they were incorrectly sized.

This isn't an icon, it's a too-small rectangular picture.
Rectangular आइकनों end up stretched, blurry, cut off या overly pixelated when uploaded on picks या as your प्रोफ़ाइल picture.
The following are acceptable आइकन dimensions:
100x100
200x200
I prefer to work in 200x200. It gives आप room to see what you're doing and increases the general image quality. When फैन्पॉप resizes it for a pick या प्रोफ़ाइल image, it looks good.
Creating Your आइकन Template
Never just crop an image and call it an icon. आप should always use a template. It just makes आइकन creation so much easier and allows आप to be और creative. Especially if आप make a lot of आइकनों [which I do].
Open up your program and create a new file.
Size: 200x200
Background: black
File type: JPEG
Save it for future use as your आइकन template. या just save this one.

200x200 आइकन Template
Choosing Images
Now you'll want to select the picture you're going to make an आइकन out of. Always choose large, high quality तस्वीरें to work with.

700x387, mediocre quality- meh, आप can find better.

1280x700, high quality- just the way I like it.
गूगल image खोजिए is not always your friend. It may take time and effort to hunt down good screencap sites but it's definitely worth it in the long run. It makes your job so much easier because there's only so much editing that आप can do to a poor quality image to make it better. Also, it may seem strange to choose such large pictures to make a small आइकन out of but trust me, good आइकन making is all about the quality of the स्रोत material.
Resizing Images
So now that you've chosen your nice big picture, it's time to resize it so it will fit on your icon.
Find the Resize tool in your program's options. Mine is located under a menu called 'Image'. Yours could be located somewhere else. Just look through all the menus until आप find it.
Open the Resize tool. It should give आप the dimensions of the picture you're trying to resize.
Example:
Width: 1280 pixels
Height: 700 pixels
Change the height to 210 pixels. Only change the height and make sure that the 'Maintain aspect ratio' box is checked. Otherwise your image will be totally warped.
The reason आप don't resize it to exactly the height of your आइकन is because you'll want to give yourself some leeway to हटाइए it around. It's very hard to position it precisely and if it's off even just a little bit it will leave a gap at the चोटी, शीर्ष या bottom of the icon.
Also, आप don't have to resize the image to 210. आप can experiment with different sizes/crops but we'll get to that in just a moment. First let's establish how to copy and paste.
Adding an Image to the Template
So आप have your resized image and are ready to make it into an icon. You're going to copy and paste it to the आइकन template as a layer.
The Copy tool is in the 'Edit' menu. Just click it and you're done. The image is copied and ready to be pasted. Go back to your आइकन template.
The Paste tool is also in the 'Edit' menu. It may offer आप several options: Paste as New Image, Paste as Selection and Paste as New Layer.
Choose Paste as New Layer.
It will drop the image directly in the center of your icon.

Standard resize/crop
Cropping Your Icon
This is the part where आप position the image so that it shows the section that आप want to see. आप can get really creative with this!

Move tool
Just click and drag.

Image was resized to 400 pixels
That way आप can zoom in on certain sections of the image.

Same image, same resize just cropped differently
You'd be surprised at how easy it is to make an आइकन look cool just द्वारा cropping it differently.
Editing Your Icon
So आप have your image resized and cropped just the way आप want it. Now it's time to सजाना it up a bit.
Sharpen
This tool is found in the 'Adjust' menu- as are all the basic tools to refine your image. I use the lowest setting. आप do not want to overuse the sharpen tool, it will pixelate your आइकन way too much. If you're using a high quality image then आप don't need to sharpen much at all.

Perfectly sharpened

Sharpened too much
Brightness and Contrast
Again, this tool is in the 'Adjust' menu. For most pictures आप don't need to go crazy with this tool. Usually just bump up the brightness द्वारा about 10 and the same for the contrast. If आप make it too bright, the darks will look washed out. If आप give it too much contrast, the darks will निगलना, निगल, निगल संकलन the light.
Saturation
Saturation is how intense the रंग are. Now depending on the effect you're going for आप might want to increase या decrease the saturation. आप can play around with this until आप find something आप like. The Hue & Saturation tool should be in the same menu as the Brightness & Contrast tool. I wouldn't recommend changing the hue unless आप want to go for a really funky effect.
There are many different tools located in the 'Adjust' menu that आप can use to tweak your images. I recommend exploring them, playing around with them and finding what works the best for you.

Sharpened, Brightness & Contrast, Saturation increased
Ok now आप have a good, basic icon. But आप could make it better...
Advanced
Watermarks and how to get rid of them
One of my biggest pet peeves about आइकनों is when आप can see a watermark on the image. It's usually from the network that aired the tv दिखाना and it's really not that hard to get rid of.
Now we are venturing into और advanced tools and be aware that not every program will call them the same thing.

Push tool sample
In my program, it's called the Push tool.
What it does:
Pushes the pixels around the image.

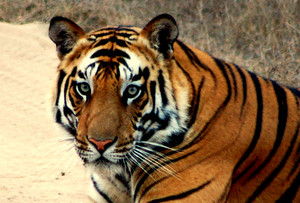
Partially obscured symbol using the Push tool.
To cover up the ugly symbol.
आप can adjust the size of the tool [you'll want it to be small] and the opacity [you'll want it to be in the midrange] आप won't want the opacity at 100% because the edges will be too hard [like in the first sample image].
आप just want to gently try to push the pixels around until it looks like the symbol was never there. Start in an area where the symbol isn't, then just click and drag the pixels over the symbol. Don't use the same starting point for the whole thing. Choose the pixels that look like they belong in that spot. In this image I used the black shadow to cover the bottom of the symbol. The और gray shadow on his neck to cover the rest, being careful not to get any dark pixels on his chin. Most programs have an 'Undo' option that can erase your last stroke if आप make a mistake.
Layers
Now we're going to get into layers and how आप can use them to improve your आइकन and make it different.
The image that आप added to your template is a layer. You're going to create one या और layers to go on चोटी, शीर्ष of it to add different effects.
In order to see and arrange your layers: Go to the 'View' menu, scroll down to 'Palettes' and there should be an option that says 'Layers'.

Layer and Color Palette
It's just a little window that shows the layers one on चोटी, शीर्ष of the other. आप can हटाइए them up या down as आप need. आप can also change the opacity and blend mode of your layers.
You'll want to create a new layer the exact size of your आइकन template. In my program I simply go to the bottom layer [called the Background], right click on it and choose 'Duplicate'.
If आप are unable to do that the simplest other way of doing it just to create another black आइकन template, then copy and paste it as a new layer.
You're going to need the Fill tool. It should look just like a paint bucket. Now आप get to choose a color. आप may have noticed the color palette on the right hand side of your workspace. It will offer आप many choices. After you've picked one, just click on the black layer with the Fill tool and there आप go.

Choose a solid color या a gradient.
After you've filled your layer with color, make sure that it's on चोटी, शीर्ष of your image layer. Now you'll want to change the blend mode and opacity in order to get different effects. आप can get all kinds of different looks with this and आप can also add और layers to get even और effects.

Blue layer set to 'Color' at 40%

Brown/Green gradient set to 'Overlay' at 95%
I usually use this specific gradient [one that I created] set to Overlay at varying opacity levels on every आइकन I make to just give it और punch.

Ivory to Skin gradient

Ivory/Skin gradient set to 'Overlay' at 55%
Then if I want something with a bit और panache या a different color, I'll add 1 या और layers- playing with different blend modes and opacity levels until I'm satisfied.

Ivory/Skin gradient set to 'Overlay' at 55%, then Brown/Tan gradient set to 'Hard Light' at 70%
Texture
आप can also add textures as another layer. I'm not going to go into a lot of detail about textures because they really aren't much different than color layers. आप just have to play with the blend modes and opacity until आप get what आप want. In this case गूगल is your friend. Here's some examples of textures:

Google image खोजिए for texture
The only thing I want to point out is that if your texture is obscuring something vital in your आइकन [a character's face for example] आप can always use the Eraser tool on it. The eraser tool looks like an eraser of course. Use a very low opacity setting on it [5%] and set the hardness level at about 50. The hardness is just how soft या hard the edge of the eraser is. Gently erase some of the texture to let vital features दिखाना through a little better.

I don't remember everything I did to this आइकन but it involved texture!
Text
Text isn't my strong suit. It's kind of hit and miss with me. I'd have to say that it's द्वारा far the most difficult part of आइकन making. Luckily, आइकनों don't necessarily need it to be pretty! But in case आप want to do it, I'll give आप the basics.
You'll need the Text tool, which will look just like a letter of the alphabet [I've seen it as a T या an A]. When आप open it, there will be a box to write in and some options to change the size, font and color. Sometimes these options won't appear in the text window but at the चोटी, शीर्ष of your workspace या in the color palette.
When आप type usually a पूर्व दर्शन of it will appear on your icon.
Now the text is going to be added as another layer. Which means that आप can use blend mode effects and change the opacity for it too.

This आइकन took a lot of time to make. lol
Size, color and font
Some tips to help make your text legible: Keep in mind that your आइकन is going to be small. As आप add the text, occasionally zoom out on the आइकन to get an idea of how it's going to look.
Most times you'll want to avoid thin, delicate fonts because they won't दिखाना up well. Use fonts that are bolder, thicker.
Try to use रंग that contrast with the image. Again, it's going to make them easier to read.

Bold font, contrasting white
Sometimes it's helpful to give the text a Drop Shadow to make it pop out more. The drop shadow tool can be found in the 'Effects' menu under '3d effects'. What it does is makes it look like there's a shadow या outline under the text. आप can choose different रंग but for most आइकनों black works the best. I recommend a strong opacity level and low blur level. आप can also change the angle of the shadow both vertically and horizontally. Be aware that once आप add a drop shadow to your text आप can no longer संपादन करे it.

Added a black drop shadow, 100% opacity, 2.0 blur, -1 vertical -1 horizontal
Please proofread your text before you're finished. There are online dictionaries that can help आप with spelling if आप need it. There's nothing और sloppy-looking than an आइकन with poor spelling and that kind of ruins the point of all the hard work आप just put into making it.
If you're interested in downloading some cool fonts to use, I recommend this website: link
I hope this guide has provided आप with some useful tips on how to make icons. If आप have any सवालों या need clarification on anything, just leave a टिप्पणी दे and I'll try to help as best I can.

Go forth and make icons!